
ELEGOO 0.96 Inch OLED Display Screen Module
4.6Editor score
Self-luminous pixels
I2C interface
128×64 resolution
This guide compares ten top Arduino LCD Display options including OLED, TFT, and I2C modules to help you choose the right screen for your embedded project.
Selecting the right Arduino LCD Display is crucial for bringing your embedded projects to life. Whether you need simple text output or vibrant graphics, the display module you choose defines user interaction and data visualization capabilities.
We evaluated ten highly rated displays based on interface type, resolution, compatibility, and ease of integration. This list covers I2C character screens, OLED modules, and full-color TFT panels suitable for makers and engineers.
Each pick highlights key specs, pros, and cons to guide your decision. Prices and availability change frequently so verify details on the product page before purchasing to ensure you get the best value.
4.6Editor score

4.5Editor score

4.7Editor score
Compare the following Arduino LCD Display options side by side to find the perfect match for your specific project requirements and budget constraints.




The Hosyond 3pcs I2C IIC 1602 LCD Display Module stands out as a top choice for hobbyists needing multiple screens. With a solid rating of 4.5 stars, it delivers reliable performance for basic text output projects.
We may earn a commission when you buy through this link, at no additional cost to you.
This module uses an I2C interface to save pins making it easy to connect to Arduino or Raspberry Pi. The blue backlight and adjustable potentiometer let you customize visibility for different lighting conditions.
While it only shows text and numbers the clear characters are easy to read. The need to manually adjust contrast might be a minor annoyance but is standard for this display type.
If you need several displays for classroom demos or batch builds this pack offers excellent value. It is perfect for IoT nodes and smart building indicators where simple readouts suffice.
The I2C interface reduces wiring complexity by using only two data lines instead of many parallel wires.
Works seamlessly with Arduino Raspberry Pi and other popular development boards for flexible prototyping.
We may earn a commission when you buy through this link, at no additional cost to you.
The ELEGOO 0.96 Inch OLED Display Screen Module is ideal for projects requiring crisp graphics in a small space. Its 4.6 rating reflects high satisfaction with its visual quality and ease of use.
We may earn a commission when you buy through this link, at no additional cost to you.
OLED technology provides self-luminous pixels that do not need a backlight saving power and improving contrast. The fixed blue and yellow zones help organize information clearly without complex programming.
Some users might miss the ability to change display colors freely but this is a hardware limitation of the panel. The three-pack ensures you have spares for testing and multi-unit projects.
Use this module for sensor dashboards or robot status panels where low power and high contrast matter. It is an affordable way to add visual feedback to embedded systems.
Self-luminous OLED pixels consume less power than LCDs with backlight making them great for battery projects.
Getting three modules at once lets you equip multiple prototypes or spare boards simultaneously.
We may earn a commission when you buy through this link, at no additional cost to you.
The AITRIP 2PCS 2.0 inch TFT Display offers premium color quality for advanced interfaces. With a top rating of 4.7 it delivers vivid images and smooth updates for graphics heavy applications.
We may earn a commission when you buy through this link, at no additional cost to you.
Its IPS panel ensures colors stay consistent even when viewed from the side. The ST7789V driver supports SPI communication which is fast and widely supported by modern boards like ESP32.
The only trade-off is increased complexity compared to simple text screens. However the clarity and brightness justify the effort for projects needing rich visual feedback or maps.
Build custom dashboards or handheld games with this module. The dual pack lets you test designs or create redundant displays for critical monitoring systems.
IPS technology ensures accurate and bright colors that remain visible from multiple viewing angles.
SPI interface allows rapid screen updates essential for animations and real-time data visualization.
We may earn a commission when you buy through this link, at no additional cost to you.
The ELEGOO 2.8-Inch TFT Touch Screen brings interactive controls to your projects. Its 4.4 rating indicates solid performance for users needing menus and button inputs.
We may earn a commission when you buy through this link, at no additional cost to you.
A resistive touch layer works with the included stylus to detect precise input. The SD card slot allows storing assets like fonts or icons directly on the screen module.
Resistive touch requires more pressure than capacitive which might feel less modern. However the shield format makes it very easy to mount on Arduino boards without wiring mess.
Choose this for kiosks or home automation panels where user interaction is key. The SD slot is a bonus for storing static resources.
SD card slot lets you store graphical assets and fonts without relying on limited board memory.
Shield design connects directly to headers simplifying hardware setup for beginners.
We may earn a commission when you buy through this link, at no additional cost to you.
The GeeekPi 2-Pack I2C 1602 LCD Display Module offers a practical solution for simple readouts. A strong 4.6 rating shows users trust its durability and ease of connection.
We may earn a commission when you buy through this link, at no additional cost to you.
Blue backlight provides high contrast for white text making it readable in most environments. The I2C interface ensures you do not waste IO pins on multiple screens.
This module does not support graphics so it is strictly for numbers and text. However for weather stations or temperature monitors that limitation is rarely an issue.
Buy this for IoT projects where you need to display sensor data simply. The two-pack helps when deploying across multiple rooms.
Blue backlight offers sharp contrast against characters ensuring easy reading even in bright rooms.
I2C protocol minimizes pin usage allowing more sensors to be connected to your controller.
We may earn a commission when you buy through this link, at no additional cost to you.
The Freenove I2C IIC LCD 1602 Display Serial features a new type design that improves stability. It holds a 4.4 rating for consistent performance across various Arduino boards.
We may earn a commission when you buy through this link, at no additional cost to you.
Integrated conversion circuit reduces wiring issues common with older models. Online tutorials replace paper manuals allowing you to access code examples instantly.
Some users might prefer physical guides but digital resources are often more up to date. The pack of two ensures you have backups for critical experiments.
Use this for reliable data logging displays. The stable circuit means fewer glitches during long run times.
New type circuit integration minimizes connection points reducing potential failure modes.
Access to online tutorials provides flexible and easy to find example code.
We may earn a commission when you buy through this link, at no additional cost to you.
The SunFounder IIC/I2C/TWI LCD1602 Display Module simplifies the entry to LCD displays. Its 4.6 rating highlights ease of use for first time buyers.
We may earn a commission when you buy through this link, at no additional cost to you.
Pre provided libraries mean you can call functions directly without writing low level code. The clear pin labeling helps avoid confusion during wiring.
This module focuses purely on text output so do not expect color. However for status lights or simple messages it is efficient and reliable.
Ideal for students learning electronics the module comes with all needed support. It is a robust choice for educational kits.
Built-in library support lets you start coding immediately without complex driver setup.
Pin labels are easy to read reducing the risk of wiring errors during assembly.
We may earn a commission when you buy through this link, at no additional cost to you.
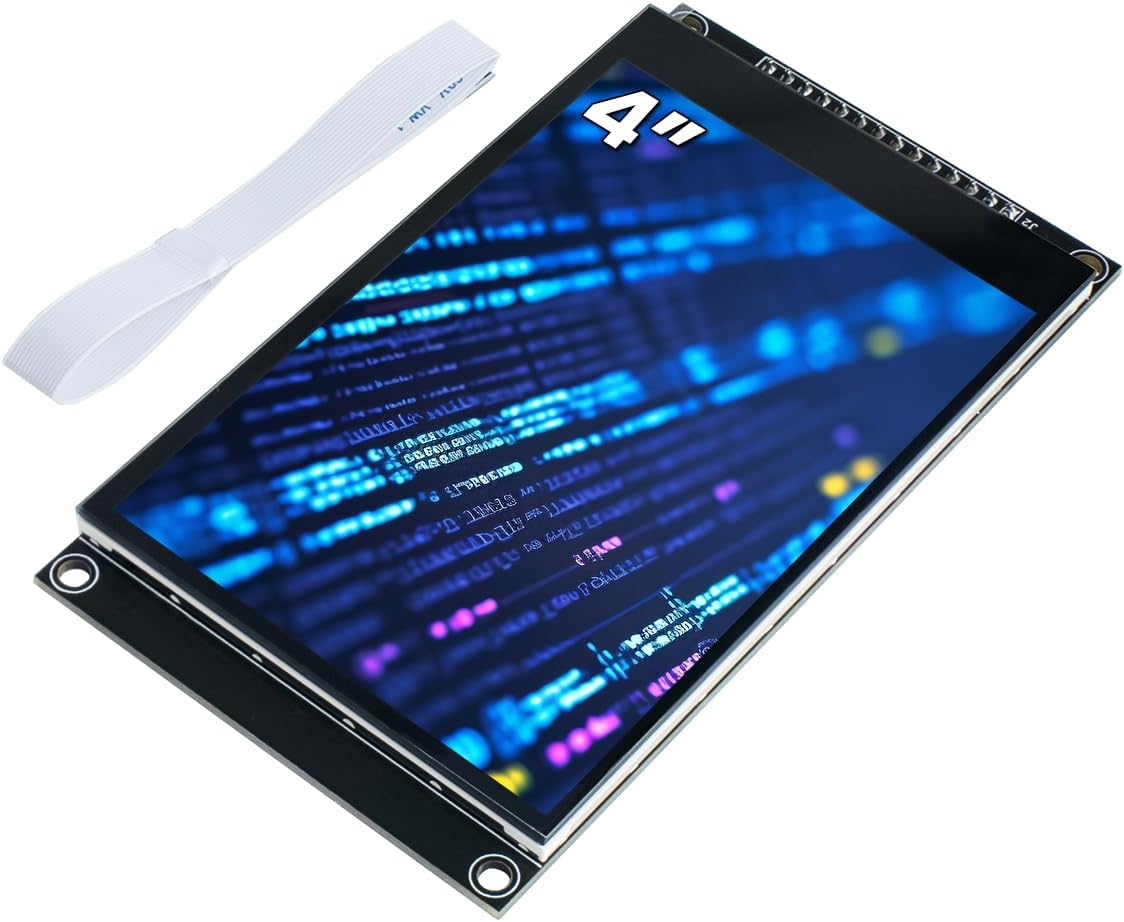
The Hosyond 4.0 Inch TN Capacitive Touch Screen offers a large display area. A 3.9 rating suggests users value the screen size but note complexity in setup.
We may earn a commission when you buy through this link, at no additional cost to you.
Capacitive touch is more responsive than resistive making it feel modern. The 65K colors allow for decent graphic rendering and maps on this 4 inch panel.
Wiring and driver configuration can be tricky compared to simpler modules. Also the TN panel may have narrower viewing angles than IPS options.
Choose this for kiosks or media players needing a bigger surface. The TF slot helps store media files locally.
Capacitive panel responds to light touch improving user experience over older resistive screens.
TF card slot enables local storage of media files and assets for offline display.
We may earn a commission when you buy through this link, at no additional cost to you.
The Hosyond 5 Pcs OLED Display Module provides a huge volume for bulk projects. Its 4.6 rating confirms high quality consistent across all five units.
We may earn a commission when you buy through this link, at no additional cost to you.
The 128×64 resolution is standard for small OLEDs and perfect for status indicators. Self-luminous technology ensures bright output without extra power for backlight.
Screen size limits detailed graphics but it is sufficient for icons or text. The bulk pack is great for production runs or classrooms.
Use this for distributed IoT nodes where each needs a small readout. Five units ensure you have plenty for testing.
Buying five at once reduces per unit cost ideal for batch production or prototyping.
Self-luminous pixels minimize current usage extending battery life in portable devices.
We may earn a commission when you buy through this link, at no additional cost to you.
The 2inch LCD Module Mini LCD Screen balances size and resolution well. A 4.3 rating reflects good image quality for this compact IPS panel.
We may earn a commission when you buy through this link, at no additional cost to you.
240×320 resolution allows detailed graphs on a small 2 inch area. The IPS technology ensures visibility from any angle.
Ensure voltage matches your board logic to avoid issues. The ST7789V driver is common but needs correct initialization code.
Perfect for wearable projects or small handhelds. The small footprint saves space while maintaining clarity.
IPS panel delivers consistent brightness and color regardless of viewing direction.
Small dimensions allow fitting into tight enclosures where larger screens would not.
We may earn a commission when you buy through this link, at no additional cost to you.
Choosing the right display depends on interface resolution and budget. Review these factors to match a module to your needs.
I2C saves pins using two wires while SPI offers faster speeds for graphics. Parallel uses many pins but is simpler to code.
Use I2C for simple text and SPI for graphics or animations.
LCDs need backlights and work well in daylight. OLEDs are self-luminous with better contrast but consume more power per pixel.
Choose OLED for indoor projects and LCD for bright outdoor use.
Text screens use 16×2 characters while graphic screens use 128×64 or higher. Higher resolution means more pixels and better visual detail.
Match resolution to your data complexity and space limits.
Touch screens add interactivity for buttons and menus. Resistive touch needs pressure while capacitive is more responsive.
Use touch for interactive dashboards and buttons.
Small displays like 0.96 inch fit tight spaces while 4 inch screens give more visibility. Larger screens require more power and space.
Select size based on your enclosure dimensions.
Most modules run on 5V or 3.3V. Mismatched voltage can damage the display or cause glitches.
Verify your board logic matches the module.
Drivers like SSD1306 or ST7789V determine library support. Popular chips have more community examples.
Choose chips with good documentation.
Adjustable backlights help in varying lighting conditions. Some displays have fixed colors.
Prioritize adjustable options for visibility.
Start by connecting power and data lines carefully. Ensure voltage matches your controller to prevent damage.
Install the correct library in your IDE and run example code to verify connection before your own sketch.
Avoid bending the screen or exposing it to moisture. Secure connections with tape or brackets to reduce stress.
The I2C 1602 LCD is the easiest due to simple wiring. You only connect four pins and use a standard library to display text. It is ideal for beginners.
Connect VCC to 5V or 3.3V and GND to ground. Connect SDA and SCL to the corresponding data pins. Use the Adafruit SSD1306 library for easy setup.
Yes most modules need software libraries to control the screen. Popular drivers like SSD1306 have well documented libraries available in the IDE.
Yes use I2C to daisy chain screens by changing addresses. SPI requires unique chip select pins. A multiplexer can help if addresses overlap.
Check wiring connections and power supply first. Ensure the contrast potentiometer is adjusted correctly. Verify that the library matches your driver chip version.
OLED offers better contrast and viewing angles. LCD is brighter in direct sunlight. Choose OLED for indoor use and LCD for outdoor projects.
We highlighted ten reliable options from simple text modules to colorful touch panels. Each pick fits specific needs like cost power or resolution.
Prioritize interface and voltage compatibility to avoid hardware issues. The best display balances visual quality with ease of integration.
Verify current prices before purchasing as they fluctuate often. Choose the module that best matches your project goals.